Expert Interior Painting Tips: Transform Your Space with Ease
Residential and Commercial Interior Painting
Are your walls whispering for a change? Sometimes, a simple coat of paint can revitalize a room, breathing new life into the very essence of your home, transforming it into an oasis of your personal aesthetic.
Let us begin.
Within these words, lies the power to transform not only a space but the very ambiance of your abode. Precise guidelines will unlock the promise of a refreshed interior.
Planning Your Painting Project
Before the bristles ever kiss the wall, strategic planning anchors the success of your interior painting endeavor. Assess the scope of the project, factoring in the square footage, existing room conditions, and desired time frame. This preliminary step isn't merely procedural; it's pivotal in aligning your vision with actionable steps that ensure a streamlined painting process without unwelcome surprises.
A comprehensive plan necessitates the selection of the proper paint type, sheen, and color palette harmonious with your interior’s architecture. Moreover, a meticulously crafted schedule carves out the necessary intervals for preparation, painting, and drying, ultimately fortifying the foundation of your project's triumph.
Selecting Your Color Scheme
Color selection sets the tone—both literally and artistically—for your interior space, conveying mood and manifesting style with each hue.
Color psychology influences perception; warmer tones can energize, while cooler hues often soothe.
In choosing a palette, consider the room's function, existing decor, and natural light, which can dramatically affect color appearance and coherence.
Incorporation of trending colors can offer a modern twist; however, classic shades endure through time, promising versatility and long-standing appeal.
Estimating Paint and Tools Needed
Accurately gauging the amount of paint needed is critical for efficiency and budgeting.
- TAPE MEASURE or laser meter to measure room dimensions
- CALCULATOR to determine total square footage
- PAINT CALCULATOR tool, often provided by paint manufacturers
- QUALITY PAINTBRUSHES in various sizes for edges and detail work
- ROLLER COVERS AND FRAMES suitable for your wall texture
- EXTENSION POLE for high and hard-to-reach areas
- DROP CLOTHS or plastic sheeting to protect floors and furniture
- PAINTER'S TAPE for clean edges and protecting trim
- SANDPAPER and FILLER for prepping walls
- PAINT TRAY and liners for rollers
- LADDER appropriate for room height
Consider additional supplies and primer for surfaces that require preparation.
Purchasing quality tools enhances application efficiency and finish appearance.
Timing and Project Stages
Masterful execution of an interior painting project demands an understanding of the sequential process and timing of tasks.
- Preparation Phase: Begins with room and surface preparation, including cleaning, patching holes, sanding, and applying primer if necessary.
- Paint Selection and Procurement: Finalize paint choices and purchase supplies well before the intended start date to ensure all materials are on hand.
- Priming (if required): Typically takes one day, depending on room size and conditions, allowing primer to dry fully before proceeding.
- Paint Application: Plan for at least two coats of paint, with sufficient drying time between coats—often a full day for each coat.
- Detail and Finish Work: This includes touch-ups, cleaning, and replacing fixtures and furniture, which may add an additional day to the project timeline.
- Curing Time: After the final coat, allow for two to three days of curing before resuming full use of the room.
Effective project management hinges on a proper timeline to deliver a high-quality finish.
Anticipate contingencies and build flexibility into the schedule to account for unexpected delays or issues that may arise.
Preparing the Canvas (Prep Work)
Before applying the inaugural brushstroke, the integrity of your walls must be meticulously assessed and fortified. This involves a thorough cleaning to remove dust, grime, and oils that may inhibit adhesion. Attentive repairs to cracks or holes, followed by a conscientious sanding, are imperative to create a seamless foundation that will yield a professional-grade finish.
It is essential to not underestimate the impact of a quality primer, which plays a pivotal role as an undercoat that ensures uniform paint application and longevity. Opt for a primer tailored to your wall’s conditions—be it for new drywall, a dark color transition, or areas prone to moisture. It is during this priming phase that the true transformation begins, as it visually obliterates imperfections and prepares the surface to bond robustly with the ensuing layers of paint.
Surface Cleaning Essentials
Surface cleanliness cannot be overstated.
Embarking on an interior painting project, one must diligently clean the surface. Allowing paint to adhere to a soiled surface would result in a substandard finish, vulnerabilities to peeling, and an overall diminished aesthetic. Hence, dedicating time to meticulously cleanse walls should be considered a non-negotiable step in the painting process.
A spotless surface ensures a pristine finish.
Do not neglect the importance of drying the surface. This task—although elementary in nature—is crucial, as applying paint over a damp surface can lead to complications such as blistering and compromised paint adhesion.
Utilizing the right cleaning solutions is essential. Opt for mild detergents or specialized de-glossing agents depending on the pre-existing surface finish, ensuring that the cleaning does not undermine the wall's integrity.
Know when to seek professional expertise. If encountering significant damage or extensive mildew, consider consulting a pro prior to proceeding; their intervention may be critical in restoring the wall to a paint-ready state.
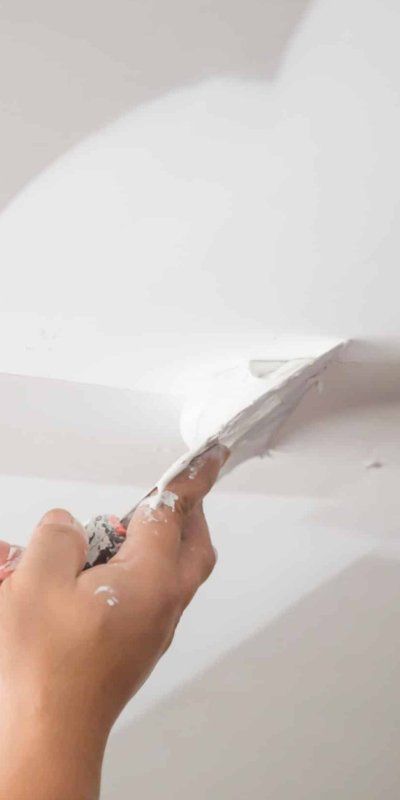
Repairing Holes and Cracks
Flawless walls require rectification of imperfections.
Before addressing the paint itself, attention must be given to repairing any holes and cracks in the walls. These blemishes are not merely cosmetic; they can undermine the structural integrity of your painted surface, resulting in diminished longevity and performance over time. Consequently, one must not overlook the importance of this preparatory phase in the pursuit of a superior final result.
Efficient repair is foundational to aesthetic excellence.
Surface preparation is critical; for it is the groundwork upon which the paint adheres. Therefore, it is vital to fill holes and cracks meticulously - to ensure that the texture of the repaired area matches the surrounding surface and to guarantee a seamless finish when the paint is applied.
Quality material selection is key to a lasting remedy.
The choice of filler products is paramount. Opt for a spackling compound for small holes and fine cracks, while larger fissures may require joint compound or plaster. Ensure compatibility with the wall material and the intended paint type to achieve professional-grade results.
Ensure thorough drying and sanding for a smooth substrate.
A methodical approach to drying and sanding is imperative in achieving a surface that is ready for painting. After applying the chosen filler, allow sufficient time for it to dry completely before proceeding to sand the area smooth. This attention to detail will result in a level and consistent substrate upon which the final coat of paint will lie.
Taping and Covering Techniques
Meticulous taping protects trim and creates sharp lines, ensuring that the final painted result is both precise and professional. Utilize painter's tape to define boundaries where colors meet, particularly at corners, ceiling lines, and alongside trim.
Choose high-quality painter's tape for best results. Inferior tapes may not adhere properly or could leave behind residue upon removal.
To prevent bleeds, burnish the tape edges. A putty knife or a dedicated smoother (specifically designed for tape application) can be run along the taped edges firmly, which seals them effectively.
Cover large areas with drop cloths or plastic sheeting. This is essential to shield furniture, flooring, and fixtures from inadvertent splatters and spills which are common during the painting process.
Weighing down the covering edges provides added protection. Use heavy-duty tape or weights to secure the edges of drop cloths, thus preventing them from slipping or allowing paint underneath.
Ensuring that the tape is removed while still slightly wet can improve outcomes. Gentle removal at an angle minimizes the risk of peeling away any fresh paint alongside the tape.
Mastering Painting Techniques
Achieving a uniform application requires a steady hand and a methodical approach. Use a high-quality brush or roller tailored to the paint type and surface texture. Begin with a primed surface to ensure optimal paint adhesion and saturation.
When working with rollers, employ the 'W' or 'M' technique for even coverage. This involves rolling the paint on in overlapping 'W' or 'M' shapes, filling in gaps as needed, and maintaining a wet edge to prevent lap marks. Additionally, consider the nap length of the roller for the texture of your walls: a longer nap for rough surfaces, a shorter one for smooth.
The brushing technique known as “cutting-in” defines precision in painting. It involves painting freehand where surfaces meet, such as corners and trim without tape, and it’s crucial for a sharp, professional finish.
Brushwork Basics
Proper brushwork is the linchpin of faultless interior painting, setting the tone for a space's overall appearance.
To begin, select a high-quality brush that fits the job: angled brushes for edges and flat brushes for larger surfaces. The bristles matter too, with synthetic ones suited for water-based paints and natural for oil-based.
When loading the brush, dip only a third of the bristle length into the paint to avoid drips and ensure greater control. Wipe the excess on the side of the container, not on the lip, which can cause paint to gum up and spill.
The application technique is critical; start with a few inches away from the edge, working toward it with smooth, confident strokes. Maintain a moderate pace to allow the paint to flow off the brush evenly, reducing the occurrence of streaks and brush marks.
In finalizing your stroke, feather the paint while it's still wet by lightly dragging the brush over the painted area. This will help blend the brushwork seamlessly, eliminating hard lines and ensuring a consistent finish across the surface.
Rolling for an Even Coat
Rollers drastically reduce painting time.
To achieve that professional, even coat with a roller, one must adopt proper techniques. Begin by selecting the roller cover's nap appropriate for your wall texture. Smooth surfaces do well with a short nap, while rough surfaces require a longer one. Moreover, the quality of the roller frame can significantly impact your painting process, offering stability and control.
A deft touch is paramount for uniform coverage.
Fully saturate the roller in paint, then remove excess by rolling it back and forth on the tray's ribbed section. This step, often overlooked, is critical to prevent drips and ensure consistent paint application.
Remember to roll in overlapping "W" or "M" shapes.
To maintain a wet edge and avoid lap marks, work in small sections, systematically blending each pass into the next. With patience and precision, this crosshatching technique allows for a smooth, seamless finish.
Frequent reapplication is key to a flawless surface.
When noticing the paint application becoming less uniform, it's time to reapply paint to the roller. Diligence in maintaining a wet edge and reloading the roller ensures a consistent sheen and texture, yielding a professional-grade result that will stand the test of time.
Cutting In Like a Pro
To cut in expertly, equip yourself with a quality angled brush, a canvas drop cloth to protect your flooring, and painter's tape for sections where precision is paramount.
The technique begins by painting a border of around 2 to 3 inches from the trim or ceiling. To achieve a straight line, position the angled brush so that it's only partially loaded with paint and the tip is guiding your stroke. This practice, known as 'cutting in,' eschews the need for tape (masking) in some instances, granting you the finesse required for sharp, clean edges. A steady hand and focused attention to detail will deliver superior results, particularly around intricate trim work or textured ceilings.
Subsequently, an essential tactic is the 'brush unload', where you gently wipe one side of the brush against the inside of the paint can to remove any excess. This step maximizes control over the paint flow and minimizes the likelihood of drips or smudges. When applying the paint to the wall, use feathering strokes to lightly brush outwards towards the field that will later be filled with a roller.
Lastly, maintain a 'wet edge' by seamlessly blending freshly painted areas with the next. It's crucial to rework into the wet paint rather than allowing it to dry, reducing visible brush marks and ensuring a uniform finish. For wall corners and tighter spaces, a smaller brush may provide enhanced manageability, facilitating precision without sacrificing speed. Adhering to these procedures will elevate the quality of your painting project, diminishing the necessity for touch-ups and yielding an immaculate, professional appearance.
The Finishing Touches
The application of painter's tape can delineate borders with sharp, clean lines — an expert maneuver to ensure a meticulous outcome. Before removing the tape, allow the paint to dry to an extent that it is not tacky to avoid peeling off any fresh layers. A keen attention to details, such as outlet covers and other fixtures, demonstrates a thorough and polished approach.
Once all paint coatings has cured, it is time to assess the room's illumination. Proper lighting can unveil subtle imperfections, providing an opportunity to apply any necessary final refinements. This last step ensures that the transformed space not only radiates quality craftsmanship but also embodies the envisioned aesthetic excellence.
Perfecting Trim and Edges
Achieving sharp, clean lines around trim and edges requires meticulous attention and the right technique.
- Preparation: Ensuring the surface is clean and smooth is paramount. Fill any gaps with caulk and sand down imperfections before you begin.
- Taping: Apply quality painter's tape firmly along the edges of the trim to protect it and to create a barrier for sharp lines.
- Brush Selection: Use an angled sash brush for superior control along trim lines, as its design allows for precise paint application.
- Paint Consistency: Ensure the paint is neither too thick nor too thin; a consistency that allows for smooth application without dripping is key.
- Application Method: Begin painting from the corner and move smoothly along the edge, applying even pressure and maintaining a wet edge.
- Feathering Technique: Lightly drag the brush at the end of each stroke to feather the paint, preventing buildup and ensuring a smooth transition.
- Tape Removal: Wait until the paint is just dry to the touch before removing the tape at a 45-degree angle to avoid disturbing the paint line.
Precision painting around trims and edges sets professionals apart from amateurs.
This process, rigorously applied, secures a flawless finish, making your paint job look seamless and expertly executed.
Cleanup and Care for Supplies
Proper maintenance of your painting supplies is pivotal to their longevity and performance. After use, immediately wash brushes and rollers with warm, soapy water, ensuring that all paint is removed.
For oil-based paints, it's essential to use a solvent such as mineral spirits or turpentine for cleaning. Begin by wiping excess paint from brushes or rollers onto a paper or cloth before rinsing in the solvent. After initial cleaning, a soapy water rinse may follow to remove any residual solvent and paint. This meticulous approach guarantees that your equipment remains pristine and functional.
Subsequently, immerse brushes in a mixture of fabric softener and warm water for a short duration to maintain their suppleness. This step is important for preventing bristles from becoming stiff and unmanageable, which could compromise the quality of your future painting endeavors.
Lastly, it is critical to store brushes and rollers correctly to ensure their shape and efficacy are preserved. Brushes should hang so that their bristles do not become deformed, and rollers must be stored in a way that avoids creasing or flattening. Such caution in storage is indispensable for professionals who rely on the optimal performance of their tools across successive projects, safeguarding their investment in quality painting equipment.
Decorating After Drying
Once the paint has fully cured, it's essential to assess the room's lighting conditions. Different types of light can dramatically alter the perception of color, affecting both the mood and ambience of the space. It's imperative to evaluate how natural and artificial light interacts with your new wall color at various times of the day.
To complete the transformation, select accent pieces that complement the newly painted walls. Opt for decor that enhances the room theme and color scheme. This may include choosing throw pillows, artwork, and curtains that harmonize with the wall color, tying the room together cohesively. Reflect on the visual balance and symmetry when arranging these elements to create an aesthetically pleasing environment. Remember that the rule of thirds in design can be a valuable principle to guide your decor placements.
Importantly, avoid placing furniture against freshly painted walls immediately. The paint, although dry to the touch, needs time to harden and adhere fully to the wall surfaces. This curing process can take several days to a couple of weeks, depending on the paint type and environmental conditions. Patience in this final stage is crucial, as premature contact can mar the impeccable finish you've strived to achieve.
Finally, maintain the room's ventilation for some time after painting to ensure a healthy environment. Even when dry, the paint can emit volatile organic compounds (VOCs) that could be harmful to some individuals. Ensuring continued air circulation helps dissipate these compounds more quickly. Embrace this period to meticulously plan how to introduce furniture and decor pieces back into the room, designing a refreshed and revitalized space that reflects your desired aesthetic. With meticulous planning and patience, the room will come together to showcase a harmonious blend of color and design.
You might also like


Book A Service Today